The Gibson Tuck kind of exploded on me. Ever since I’ve been getting requests to do more hair tutorials, but I’ll be 100% honest with you, I’m no hair wizz. I, like most of you who email me, just like the easy and uncomplicated stuff that manages to look swell despite it’s simplicity. There have been several instances where I thought I’d found something I could share, but in the end I felt silly because it just seemed so easy. It felt like a magic trick, and that the style was really impressive, until of course you know the trick, and then it looses all it’s allure. But I realized that I’m totally cool with that. I’d like to be the simple hair lady. And I’d like to share stuff that only requires ponytail holders and bobby pins, stuff that I like for my own hair. Now I know I just cut off my own hair, but don’t worry, I will still provide tutorials like this one. I can’t decide if I’m going to use a friend or get myself a wig, but either way I will keep them coming when I can.
What You Need
-
★ comb
★ two hair ties (it doesn’t really matter what color)
★ bobby pins
What You Do
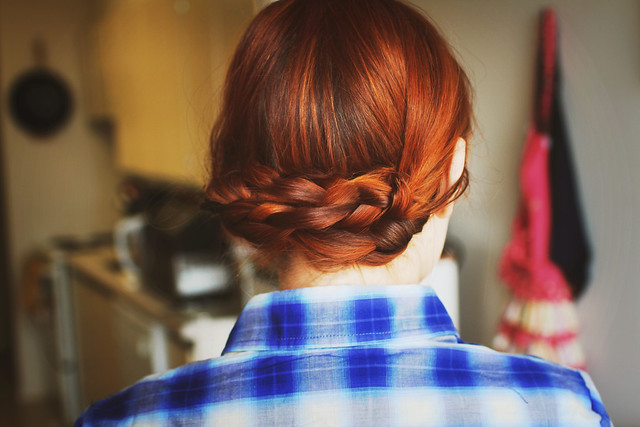
You’ll want to make two braids on either side of your head. Don’t worry about a perfect part because you’re going to comb over it so it looks like there was no part. Now, there are several neat tricks you can do with this to make it interesting, so let’s start with the basics. In the video I braid my hair down my side, but I’m careful not to pull it towards the front when I’m braiding because that will make a strange bump when I pull it back. I think this might depend on hair type, so if you want to try it and see what it looks like, it can’t hurt to try. Some of my best discovers have been accidents! But for now, try to braid it while pulling it to the side or as close toward your back as you can. If you have shoulder length hair, start your braid more towards the back instead of on the side or the front. It will create the same effect! It may be a little difficult to braid behind your own head at first, but it just takes a little bit of practice (and perhaps mumbling allowed to yourself, “one, two, three”).
My hair is really layered, so to get it like the picture above, I had to get the ends a little damp first, so they’d stick together and braid without ends sticking out all over the place. You’ll notice in the video my hair is bone dry and I had to do a lot of pinning and tucking to get the ends to hide. It was also the day of my hair cut, so I didn’t get a chance to dampen it before my appointment!
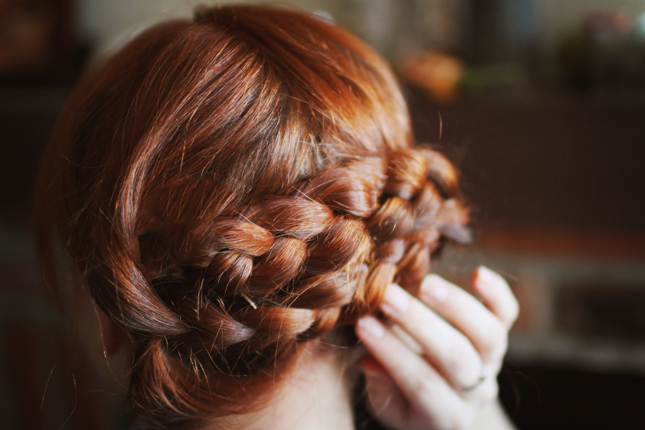
Once you’ve braided both braids, you’ll want to take one and lay it across the back of your head, tucking the end underneath so the ponytail can’t be seen. Use some bobby pins to pin the braid in place. In the video I put the braids higher up on my head because I like that look, but if you want to mimic the Katniss Reaping style from The Hunger Games, you’ll just want to put them lower on your head. It doesn’t matter which side goes where, or which braid goes over or under, you can change it each time you try it! If you’re like me, and you feel like you’ve got more hair on one side than the other, I usually make my thicker braid the first one pinned and put the smaller one on top so it stays.
Finally when you’re done pinning, you’ll want to take your comb and gently run over your part so that it looks clean. I totally forgot to do this in the video, and obviously I don’t have hair anymore so I can’t redo it, but I do this move at the very end of The Gibson Tuck, so if you’re confused just take a peek at that.
Video
If you’d like to view or favorite for later, this video is also on YouTube.
Enjoy!




19 Comments
100 Braided Hairstyles You Need to Try - STYLECASTER - News Portal
19 Oct 2022 at 2:53 am[…] if your hair is shorter, then be sure to secure with tonal bobby pins.Image via Pinterest. From saralynnpaige.com.We love the breezy appeal of this French braided style knotted at the nape of the neck. […]
Anna
21 Nov 2018 at 1:28 pmThe Internet has also made it easy for anyone to comment publicly about celebrities.
Roxanne
24 Jan 2018 at 2:15 amI love summer..
Elizabeth
4 Aug 2017 at 12:22 pmowesome article hope you will provide us that kind of quality content.
thanks for share it
julia https://fashion2days.com/
9 Jun 2017 at 3:14 ami say that this is just owsome
Mary Hair Obesessed
21 Apr 2017 at 7:16 amWow, you make it look so easy, I just tried and made a mess of myself. The video is really good, I will try to follow it more carefully later today! thanks for sharing!
Sara
30 Apr 2017 at 6:01 pmSometimes it falls apart when I do it, even to this day. It just takes some practice. 🙂
101 Braid Hairstyles for (Endless!) Inspiration - Crystal De Beauty
20 Dec 2016 at 11:15 am[…] Image via Pinterest. From saralynnpaige.com. […]
70+ Cute French Braid Hairstyles When You Want To Try Something New
1 Nov 2016 at 7:38 pm[…] is this neat hairstyle. To achieve this look, simply braid your hair into a side fishtail braid and wrap around your head like a traditional crown braid. Elegant, yet […]
50 Delightful Prom Hairstyles That Are Currently In Trend
27 Jun 2015 at 6:42 am[…] Get the tutorial from Sara Lynn Paige! […]
getting rid of gynecomastia
10 Jul 2014 at 6:44 amIt’s great that you are getting thoughts from this article as well as from our discussion made here.
Summer Braided Twist Updo | hair styles
21 Mar 2014 at 6:47 pm[…] Remember Sara Lynn Paige? Her Gibson Bun tutorial is amazing! And really easy to make, it’ll just look like you put some effort in it. So here’s another beautiful & quick braid twist. As you already know, I always tend to post easy hair tutorials, even though it has braids or something like that. To be honest, I’m not that good at braiding them, sometimes I even mess up the regular ones. So don’t worry. And for more info, visit Summer Braided Hairstyle l Katniss Reaping Braids. […]
Rowena
21 Feb 2013 at 11:50 amI’ve just tried this style after wearing you gibson tuck fairly regularly for the past year and was surprised to find my braids were twice as long as yours! I ended up pinning them into a messy coil rather than across, which is nowhere near as neat a look, but is definitely simple and unique so thankyou for inspiring my new easy updo!
Sara
22 Feb 2013 at 8:52 amThanks Rowena! I’m glad that it worked for you, and even though they weren’t straight across I bet the coil looked really neat!
Kaylie
12 Jun 2012 at 9:53 amI just love these simple hairstyles/updos! I especially love that it is from the hunger games and you have achieved simple. Thanks!
Angélica
29 Apr 2012 at 6:22 pmAh you’re one of my Flickr contacts for a while now, but I finally found your blog. Love it! Also love your hair tutorials (even though mine is way too short to do any of it ;))
I was just wondering, did you dye your hair with henna? I do and yours just looks exactly like mine!
Lauren
23 Apr 2012 at 5:45 pmLovely and simple. My kinda hair do! 🙂 I’m happy to hear that you’ll continue to post some longer hair styles even with your shorter hairs. 🙂
Kathryn
21 Apr 2012 at 1:49 amI will be trying this one and your other hair how-tos because I love that it’s so simple, the more complex stuff I might never get around to doing as I’m terrible at doing anything other than a ponytail in my own hair. your video is great, makes me want to see if I could manage it. 🙂
Mandy
20 Apr 2012 at 4:19 pmOh please be the simple hairstyle lady! I’m so hopeless with hair styling that I need all the simple tips I can get!!